I like shortening pie crust and butter pie crust for different reasons. Pies made with shortening (I use a mix of regular and butter flavored) seem to get the most compliments because people hone in on the super flaky texture. However, I personally love the flavor of butter crusts, which can be just as flaky when made with precision. Making a flaky, blind baked butter crust that doesn't shrink takes a little practice and attention to detail.
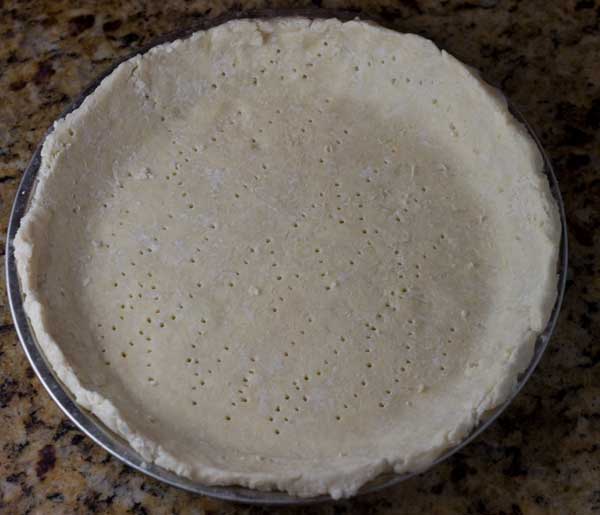
All Butter Pie Crust Making Tips
To get a great texture and avoid shrinkage, here are some tricks for the perfect all butter pie crust.
1. Shred the butter and use cold flour
2. Use a butter formulated with less water like Land o'Lakes or Plugra
3. Keep the dough cold (notice a pattern here?)
4. Don't overwork the dough or process it too much in the processor (if using)
5. Use a flour such as White Lily or a mixture of all-purpose and cake (not totally necessary, but it helps)
6. Let the dough relax through various stages. Pie crust is a great make-ahead item.
Additionally, a food processor really comes in handy, but I don't like cleaning it so I only pull my processor out if I'm making multiple crusts or need it for something else. So this recipe is made by hand, but feel free to bring in the processor.
Update: I use my processor more often these days for double crusts, but for this single crust it's still best to just make it by hand and shred the butter. I've also had really good results with Bob's Red Mill Pastry Flour. For the flour, make sure to weigh it for best results.
Recipe

Baked All-Butter Pie Crust
Ingredients
- 160 grams all-purpose flour 1 ¼ cups
- 8 grams granulated sugar 1 ½ teaspoons
- 2 ml salt ½ teaspoon (very scant), omit if salted butter
- 114 grams very cold unsalted butter ½ cup/4 oz
- 4-6 tablespoons of ice cold water or as needed 56 ml plus more as needed
Instructions
- Measure the flour and put it in a large mixing bowl.
- Mix the flour, sugar and salt very well in the bowl. Shred the cold butter over the flour. Toss everything together lightly with a fork to keep the butter bits separate.
- Using your fingers, lightly work the mixture into a coarse meal.
- Add about 3 tablespoons of water and mix with a spoon or heavy duty scraper. Keep adding water until dough just barely comes together.
- Dump the mixture onto a big sheet of plastic wrap and press it all together a little tighter. It shouldn't crumble at this point.
- Wrap in plastic wrap and let it rest in the refrigerator for at least 30 minutes.
- When ready to roll, set the dough on top of piece of lightly floured parchment paper or plastic wrap, then put another sheet of parchment or plastic wrap over the dough and press it down slightly. If the dough cracks, let it come to room temperature. I find it easier to deal with while cold, though.
- Roll into a large (12 inch) circle. Peel away top layer (bag or parchment) and transfer to the pie plate. You can do this by folding the circle into quarter and transferring it with a scraper or you can set the pie plate upside down over the circle and flip, so that the crust goes into the pie plate. This can be messy, so do it over the sink.
- Very carefully peel it away. If your crust starts to tear as you peel off the parchment, put it in the freezer for a few minutes and then peel.
- Once parchment is peeled away, crimp the edges of the pie and put the crust covered pie plate back in the refrigerator for about an hour. The point is to keep it cold and relax the gluten so it won't shrink.
- To blind bake, cover cold pie crust with greased foil or parchment, add pie weights and bake covered at 375 F for 20 minutes. Remove weights and foil and continue baking for another 15 minutes or until lightly browned.

Sue says
I kept looking around Cookie Madness and answered my own question by reading another of your posts! Hope you’re having fun making pie!
Sue says
Does this work as a double crust for fruit pie without par baking?