I have so many apple pie recipes, and Broiled Apple Pie is one of my top favorites. The reason it's called Broiled Apple Pie is because you briefly broil the sliced apples before mixing them with other ingredients. Broiling the apples (along with a couple of tablespoons of sugar) not only caramelized the edges a bit, but it renders some of the juice and partially cooks the apples so that they won't shrink as much as the pie bakes.
Jump to Recipe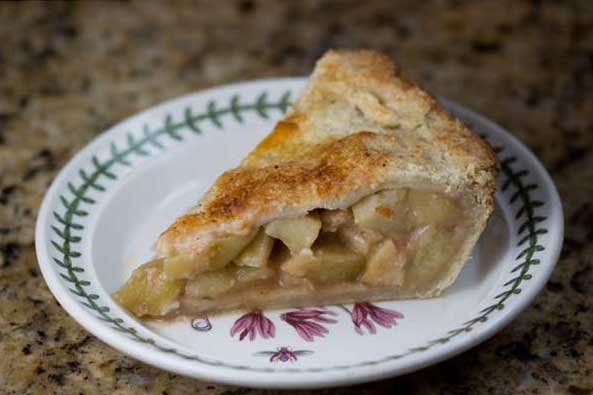
Broiling Apples
It's very important not to over-broil the apples. I've done this (luckily it was a small batch) and have had to throw the mushy apples out. For this pie, you broil the sliced apples in a roasting pan for about 10 minutes or until the edges just start to brown. You then mix all the ingredients together in the roasting pan. So you don't have to dig out the broiler pan from wherever it hides or worry about cleaning it. You're just putting a big roasting pan full of apples in the oven, broiling them six inches away from the broiling element, and mixing everything together right in that roasting pan.
Bake on a Preheated Sheet Pan
At one point I made this pie with a European style butter crust. It was the best crust I'd ever tasted, but it leaked butter. I learned quickly to bake this pie on a rimmed baking sheet no matter what crust recipe was used. I have since removed the crust recipe and am leaving it up to you to choose your own crust. Also, preheating the baking sheet before setting the pie on it usually helps the bottom crust bake. So set the pie on a hot baking sheet.
Tried and True
Try the pie and let me know what you think! It has the stamp of approval from me, and also from Sue at Basically Baked, who made it a while back and posted a review. And if you do want to try the European style butter crust, you can turn to Dawn's original version which won a big prize.
Small Broiled Apple Pie Recipe
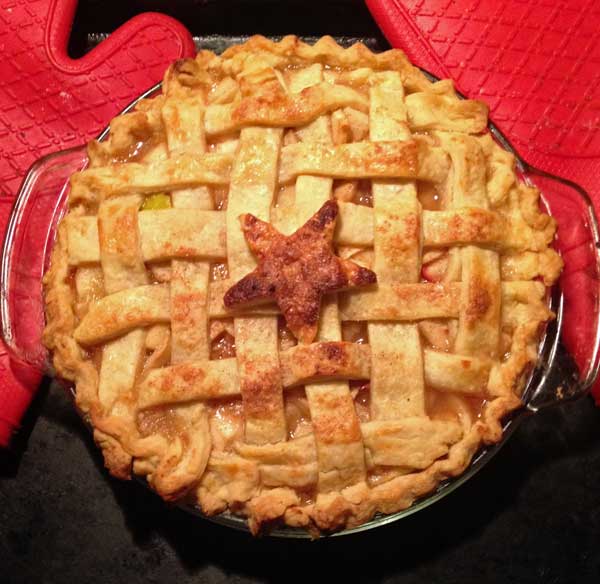
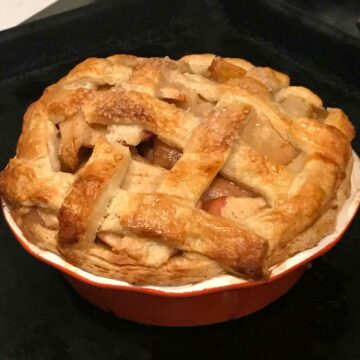
Lately I've been broiling the apples in my Breville toaster oven and making this pie in a little ceramic 5-inch pie dish. If you'd like to make it in a smaller pie dish such as a deep 5-inch or perhaps a 6 or 7-inch dish, just follow the directions, but quarter all the filling ingredients. For the apples, that means starting with about 12 to 13 oz. I sometimes use a little more than that, but I quarter everything else. Bake time for the small pie is usually about 45 minutes at 400, with top shielded if necessary for the last 15 minutes.
Recipe
Broiled Apple Pie
Ingredients
- Pie dough for a two-crust 9 inch pie
Filling:
- 3 pounds Granny Smith Apples, peeled, cored and sliced 6 to 8 apples (Or other pie apples)
- 2 teaspoons cinnamon
- 1 cup granulated sugar (200 grams)
- 4 tablespoons all-purpose flour
- ½ teaspoon kosher salt
- ¼ cup apple cider or apple juice OR use 2 tablespoons apple juice concentrate or use pear juice
- 1 teaspoon vanilla
- 1 tablespoon heavy cream
Egg Wash:
- 1 egg
- 1 tablespoon of cream
- Coarse sugar or vanilla sugar
Instructions
- On a floured surface, roll out half your dough to make a 12-inch circle. Place in the bottom of a deep dish 9-inch pie plate. Chill dough-lined pie plate while you prepare the apples.
- Preheat the broiler. In a large roasting pan, toss apples, cinnamon and 2 tablespoons of the sugar. Position the pan so that the apples are about 6 inches under the broiling element. Watching carefully, broil until the tops of the apples begin to brown (you do not want them cooked through, but rather just caramelized around the edges a bit). Remove from heat.
- To the roasting pan of apples, add the remaining sugar, flour, and salt. Stir until evenly mixed. Stir in apple juice, vanilla and cream. Pour apple mixture into the crust.
- Roll the second section of pie dough out to a large circle on a lightly floured surface. Place on top of the apples and pinch the top and bottom dough edges together to enclose the apples. Slice 1” air vents around the top of the pie.
- Make the egg wash: Mix the egg in a small dish and mix in cream. Lightly brush the egg wash over the top of the pie and along the edges. Sprinkle with coarse sugar.
- Preheat the oven to 400 degrees F and put a rimmed sheet pan in to heat along with the oven. When pie is assembled, set it on the hot rimmed sheet pan.
- Bake at 400 for 30 minutes. If after 30 minutes the crust appears to be browning rapidly (this will depend on which crust recipe you use), cover loosely with aluminum foil. Turn pie. Continue to cook for another 15 minutes. Continue to cook for 7 minutes, as needed, until the crust is golden brown and flaky.
- Cool: Remove from oven and let cool for at least two hours before cutting and serving

Carolyn says
Hello again, Anna ... I see your point on using the food processor up until adding the water. Pastry flour is not too accessible here either. I make my own cake flour with unbleached all-purpose flour (1 cup minus 2 Tbsp) + cornstarch (2 Tbsp) throughly sifted a few times. I will try measuring by weight vs volume, and also consider the 3-2-1 ratio. Thanks for ALL these ideas, you've been great 🙂
Carolyn
Anna says
Carolyn, about the food processor. The processor is great for cutting together the flour and fat, but I think it's best if you dump the flour/fat mixture into a bowl before adding the water. Also, make sure you really cut the fat into the flour. There should be a few scattered chunks of butter, but if you have too many large chunks of butter then the crust will be tough. Also, if you go with cake flour instead of pastry, mix the cake flour with some all-purpose. I think the protein in pastry flour falls somewhere between all-purpose and cake. I have a really difficult time finding regular pastry flour around here. Most stores have whole wheat pastry flour, but not regular pastry flour. And one more tip. Try using the ratio is 3-2-1 on your scale. 12 ounces of flour (by weight), 8 ounces of butter and 4 ounces of water. Volume amounts are so inaccurate with pie crusts because 1 cup of flour can have a different weight every time.
Carolyn says
Hello Anna
I appreciate hearing all your ideas - thank you! Good ideas grating the butter, and having a couple baking sheets available to catch drips. I have indeed been using the food processor. I do use good quality butter (Lactantia here in Canada) but haven't tried Plugra. Will try using cake flour too.
When making my next pie, I will consider the recipes you linked above.
Thanks again for your feedback!
Carolyn
Christine from Cook the Story says
Love the butter crust in this recipe!
Sue says
Lucky folks at the school function!!!
Anna says
Just thought of one more tip for your all-butter crust experimenting. Skip using the food processor (if you happen to be doing so) and try shredding cold butter over the flour. Shredding butter can be scattered over the dough more evenly and you won't have to work the mixture as much with the pastry cutter (or fingers) to make the coarse meal.
Anna says
Hi Carolyn,
First off, here's a link to the crust I used for this pie.
http://www.disneyfoodblog.com/2009/09/28/interview-national-pie-champion-and-orlando-chef-dawn-viola/
I skip the vanilla bean, use regular flour (not "organic") and use Plugra instead of Danish style butter. The resulting crust is fantastic -- almost like a buttery puff pastry. Unfortunately, the butter leaks out of the crust's perimeter as it bakes. I do put a rimmed baking sheet underneath and swap it out for a fresh one as it collects butter, but the house still ends up smelling like burnt butter. It only happens with this particular crust, though.
Here's another all-butter crust which tastes great and won't leak everywhere.
https://www.cookiemadness.net/2014/01/baked-all-butter-pie-crust/
Just make sure to do all the tricks -- chill the flour, chill the butter, chill the crust after lining the pan and make sure to put a rimmed baking sheet on the rack underneath the rack with the crust. You mentioned your butter was going on the floor of your oven, so the rimmed baking sheet will at least solve that problem. In fact, you might even want to have two sheets on hand so when one starts collecting butter you can quickly swap it out for a clean one. The crust in the second link shouldn't drip butter, but it's good to be safe.
Another thought. What brand of butter are you using? When I use Land o Lakes I get a flakier crust than when I use a store brand and suspect the store brand has more water in it than Land o Lake's.
Using a softer flour such as White Lily can help remedy the toughness, as it has less gluten, so you might want to order some White Lily and try one of their recipes. That, or mixing a little cake flour in with your all-purpose can help.
I've made some really tough and crispy all-butter crusts, so I do know what you mean. However, if you keep practicing and experimenting with different brands butter/flour, you'll eventually get good results.
Glad you like the Hob Nobs!!!
Carolyn says
Hello Anna
In this post, you have identified my ongoing challenge with all-butter pie crust: every time (yes, EVERY time!) I bake a pie, the crust experiences a melt-down in the oven - despite having chilled beforehand: it literally droops and begins to melt, dripping butter onto the floor of the oven, causing smoke to escape from the oven door when I open it, and in the end it sets off the smoke alarm. Once all is said and done, the crust is crispy and tough.
I have tried many (all-butter crust) recipes with the same results.
I am a long-time baker and have success with many other sweet treats but all-butter pie crusts are my nemesis.
Aside from using shortening which I do not use in my baking, what would you suggest?
PS I've just finished baking one of my favorite all-time recipes from you and your site: the homemade Hob Nobs. They are fantastic every time.