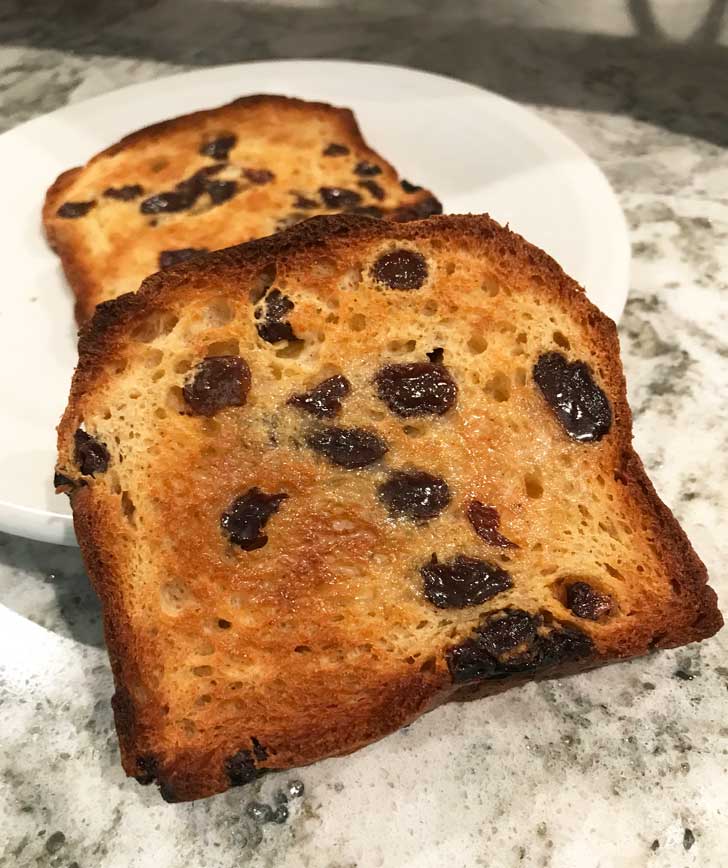
If you usually buy gluten-free bread but want to try baking it yourself, here's a fairly easy recipe for gluten-free raisin bread. It's one of my favorites, and the rest of the family loves it too. This yeast bread rises high, tastes sweet and cinnamon-y and is packed with raisins. Of course the nice thing about making it yourself is you can use as many raisins as you want or a combination of brown and gold. I keep making this version over and over, but I may try cranberry with a little orange soon.
New Year, New Flours!
The only catch is that making gluten-free yeast bread involves a whole new array of flours. This can be overwhelming at first, but once you start using blends of wheat flour alternatives (and getting used to using psyllium and xanthan gum), it becomes second nature. In fact, you'll find that it is easier and less time consuming than making regular yeasted bread because there's usually not much kneading and just one rise. But there's a learning curve because the chemistry is different.
Gluten-Free Flour Blend
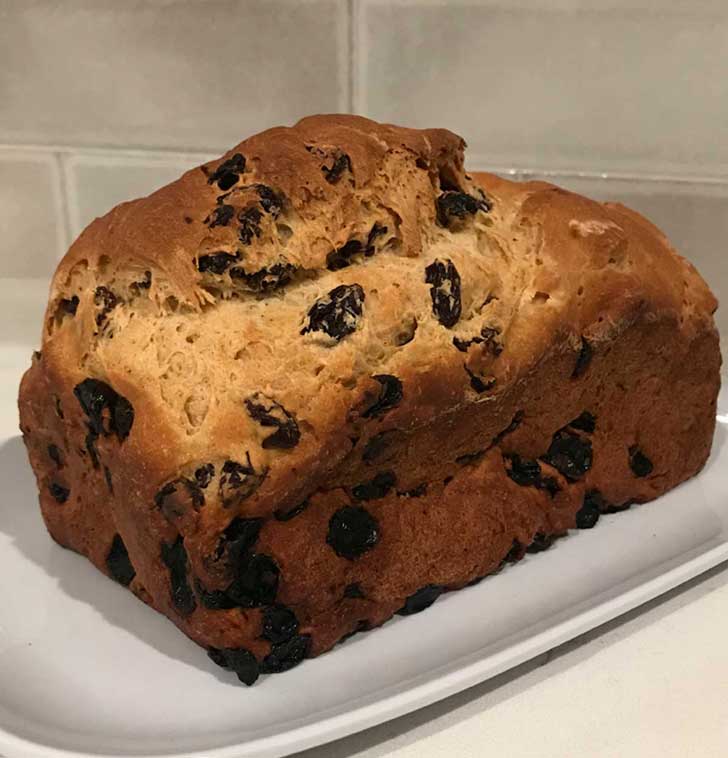
The flour mixture in this bread is a blend of cornstarch, tapioca starch and very fine brown rice flour, all of which can be ordered from Amazon or Vitacost. Of the three, the cornstarch and tapioca flour are easiest to find, but superfine rice flour is still kind of a speciality item, and different from the rice flour that's usually in the baking aisle. Vitacost and Authentic Foods are the two brands I use. For tapioca flour/starch I use Bob's Red Mill and for the cornstarch I use whatever brand is on sale.
Xanthan Gum vs. Psyllium
To make up for the structure that gluten would usually provide, gluten-free bread recipes call for binders like psyllium or xanthan gum. Psyllum is a fiber (pretty much the same as unflavored Metamucil) and xanthan is a gum. I bake with both, but for this loaf, xanthan gum works best. One day I'll test with psyllium, but as of now I'm afraid to mess with success since this bread rises so high and has such a fluffy texture.
Gluten-Free Yeast Bread Dough
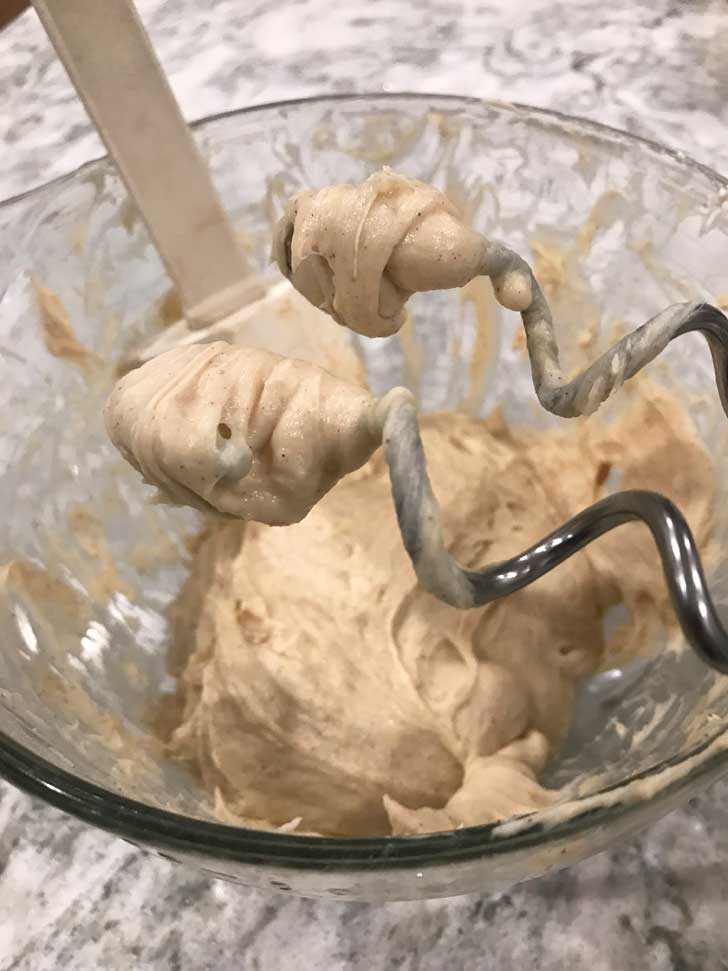
If you are new to gluten-free yeast bread making, you'll quickly learn that gluten-free bread dough is nothing like regular gluten-bread dough. It's much softer and in some cases more like cake or muffin batter. It usually requires a little mixing or kneading though, during which it thickens and becomes smoother. A stand mixer with a dough hook works best, but you can also use a handheld mixer with dough hooks. Here's a picture of my latest batch with the handheld mixer and dough hooks. Yeast dough tends to climb up regular beaters, so be sure to use the hooks.
Pullman Pan or 8 ½ by 4 ½ Inch Pan
For taller bread, you need to use a slightly smaller loaf pan. A regular 8 ½ by 4 ½ inch pan works, but for an even more stately loaf you can try a 1 pound Pullman pan. The tall sides of the Pullman give the dough the support it needs to climb and stay high. This is the Pullman pan that I own. It works well, but you have to bake on a rimmed baking sheet because it has tiny holes in the bottom and grease from the sides of the pan will seep out.
Using a Gluten-Free Blend
For those who don't do a lot of baking it's sometimes more economical to buy a pre-mixed blend such as Cup4Cup, Measure for Measure or Bob's 1:1. They are all great products, but I haven't yet tested this recipe with any pre-mixed blend. I will update when I try it.
Recipe
Gluten-Free Raisin Bread
Ingredients
Soaked Raisins
- ⅔ cup raisins or up to 1 cup (160 grams for 1 cup raisins)
Dry Mixture
- 90 grams corn starch (90 grams)
- 80 grams extra fine brown rice flour (make sure it's extra fine) (80 grams)
- 80 grams tapioca flour (80 grams)
- 1 ¾ teaspoons xanthan gum
- 1 ½ tablespoons brown sugar (20 grams)
- ¾ teaspoon cinnamon
- ¾ tsp. salt
- 2 teaspoons baking powder
- 1 tablespoon nonfat dried milk powder
Yeast Mixture
- ⅔ cup water warm (105 degrees)
- 1 ½ teaspoons active dry yeast
- 1 tablespoon granulated sugar
Wet Mixture
- 2 large eggs (room temperature)
- 3 tablespoons I Can't Believe It's Not Butter or buttter softened (42 grams)
- ½ teaspoon apple cider vinegar
Instructions
- Before you begin making the bread, put the raisins in a small saucepan and cover with water. Bring mixture to a quick boil, then turn off heat and let raisins soak while you prepare the bread. At any point during the process, drain them well.
- Grease an 8 ½ by 4 ½ inch loaf pan or better yet, a 1 pound capacity Pullman pan. I like to use a combination of shortening and a strip of parchment for extra insurance.
- In large mixing bowl or the bowl of a stand mixer, whisk together corn starch, brown rice flour, tapioca flour, xanthan gum, brown sugar, cinnamon, salt, baking powder and milk powder.
- In a microwave-safe measuring cup, heat the water for about 30 seconds, then use a thermometer to make sure it is between 105 and 110 degrees .
- Add the yeast and the granulated sugar to the warm water. Stir it all together, then set aside to proof for about 5 minutes or until it becomes foamy and active.
- Meanwhile, whisk together the eggs, softened butter or I Can't Believe It's Not Butter and vinegar. Don't worry about the butter staying in clumps, as long as it's soft it will be fine.
- Combine the flour mixture and the egg mixture and stir until dry and crumbly.
- Add the activated (foamy) yeast water.
- Using the dough hook attached to the electric mixer, beat on medium for about 3-4 minutes, stopping often to scrape bowl. The batter should thicken slightly as you beat it and will be just a bit elastic. It will not be thick like regular yeast bread dough.
- Drain the raisins if you haven't already and work them into the dough.
- Scrape the batter into the prepared loaf pan and smooth the top with the back of a spoon or a spatula or you can dampen your fingers a bit with some water and press down.
- Cover with greased plastic wrap and set in a warm place to rise for about 35 minutes. If you are using a tall-sided Pullman pan it will puff up, but won't reach quite to the top. If you are using a regular 8 ½ by 4 ½ inch pan, it will be close to the top. Remove the wrap when you notice the dough is close to touching it.
- Preheat oven to 375°F.
- When dough is done rising, set the loaf on a rimmed baking sheet and bake on center rack for about 40 to 45 minutes. Internal temperature should be between 203 and 208°F.
- Let the bread cool for several hours or overnight before you slice it.

Anna says
Thanks for taking a chance on this one, Karla! I really appreciate it and am glad you found a homemade gluten-free raisin bread recipe you like.
Karla Page says
Amazing bread - thank you! My husband and I enjoyed this loaf as a part of our dinner tonight.
Anna says
Thank you for trying it, April! It always feels so great to pull a good loaf of gluten-free bread out of the oven. I'm so glad this is working for everyone.
April says
This was an awesome recipe!! Will definitely be making it regularly!! Texture was great and baked beautifully!!
Anna says
Jeanne, thanks so much for taking a chance on my gluten-free raisin bread recipe!!! You are the first baker to give me feedback, and as someone relatively new to gluten-free bread baking I really appreciate it. It's such a challenge making really good gf yeast breads that taste like normal wheat bread. So thanks for trying this. I'll keep posting gf bread recipes.
Jeanne says
this was an amazing gf raisin bread. the frozen gf breads do not compare! this one is light and fluffy with great texture. I modified it just a bit because my daughter is dairy free: instead of the milk powder, I used .half a tsp of ground flaxseed. my guess was the milk was supposed to bind and give texture and soak up some liquid. so I chose half the amount of flaxseed. it seemed to work :). thank you for this delicious recipe!